First a little background;
I knew when I first got engaged who I wanted to be part of my half of the wedding party, but I wasn't sure what role each of the lovely ladies would play. So, I let that part of the planning fall by the way side until I came to an offfical decision. Since we've recently been really jumping into planning I thought this would a great time to recruit the team before we jumped into making save-the-dates, invitations, programs, etc. The more hands the better!
Fast forward, so just like any Pinterest addict would do I took to the internet to get some ideas on fun ways to ask my girls to be part of the big day. I really liked Rinse and Repeat's take on her be my maid DIY (you can see the original post here) and thought that I could definitely put something similar together. Upon further "research" :P I found weddingprepgals that had the BEAutiful robes that would be perfect for the day of to wear while getting ready. BINGO! What a perfect keepsake and they were well within my budget of $50 per bridesmaid.

I had each robe monogrammed in the front with everyone's first initial.

For myself and the maids/maid of honor I also had the backs embroidered with each title :)
I gathered all my supplies; I got the photograph boxes from A.C. Moore (5 in total). Paint chips from Home Depot to correspond with our color scheme, AWESOME mason jar insulated mugs from Walmart( in the seasonal section! This turned out to be a great last minute idea!) Ribbon wands and 1 bracelet for each maid.

I am really into personalized gifts and homemade stuff so I decided to put my own touches on the gifts with a personalized poem and a little decoration.

Here's one of the boxes with the finished name...My handwriting is not the greatest so I found a font I liked and printed it on regular printer paper. I then took a thumb tack and made tiny holes all the way around each name:
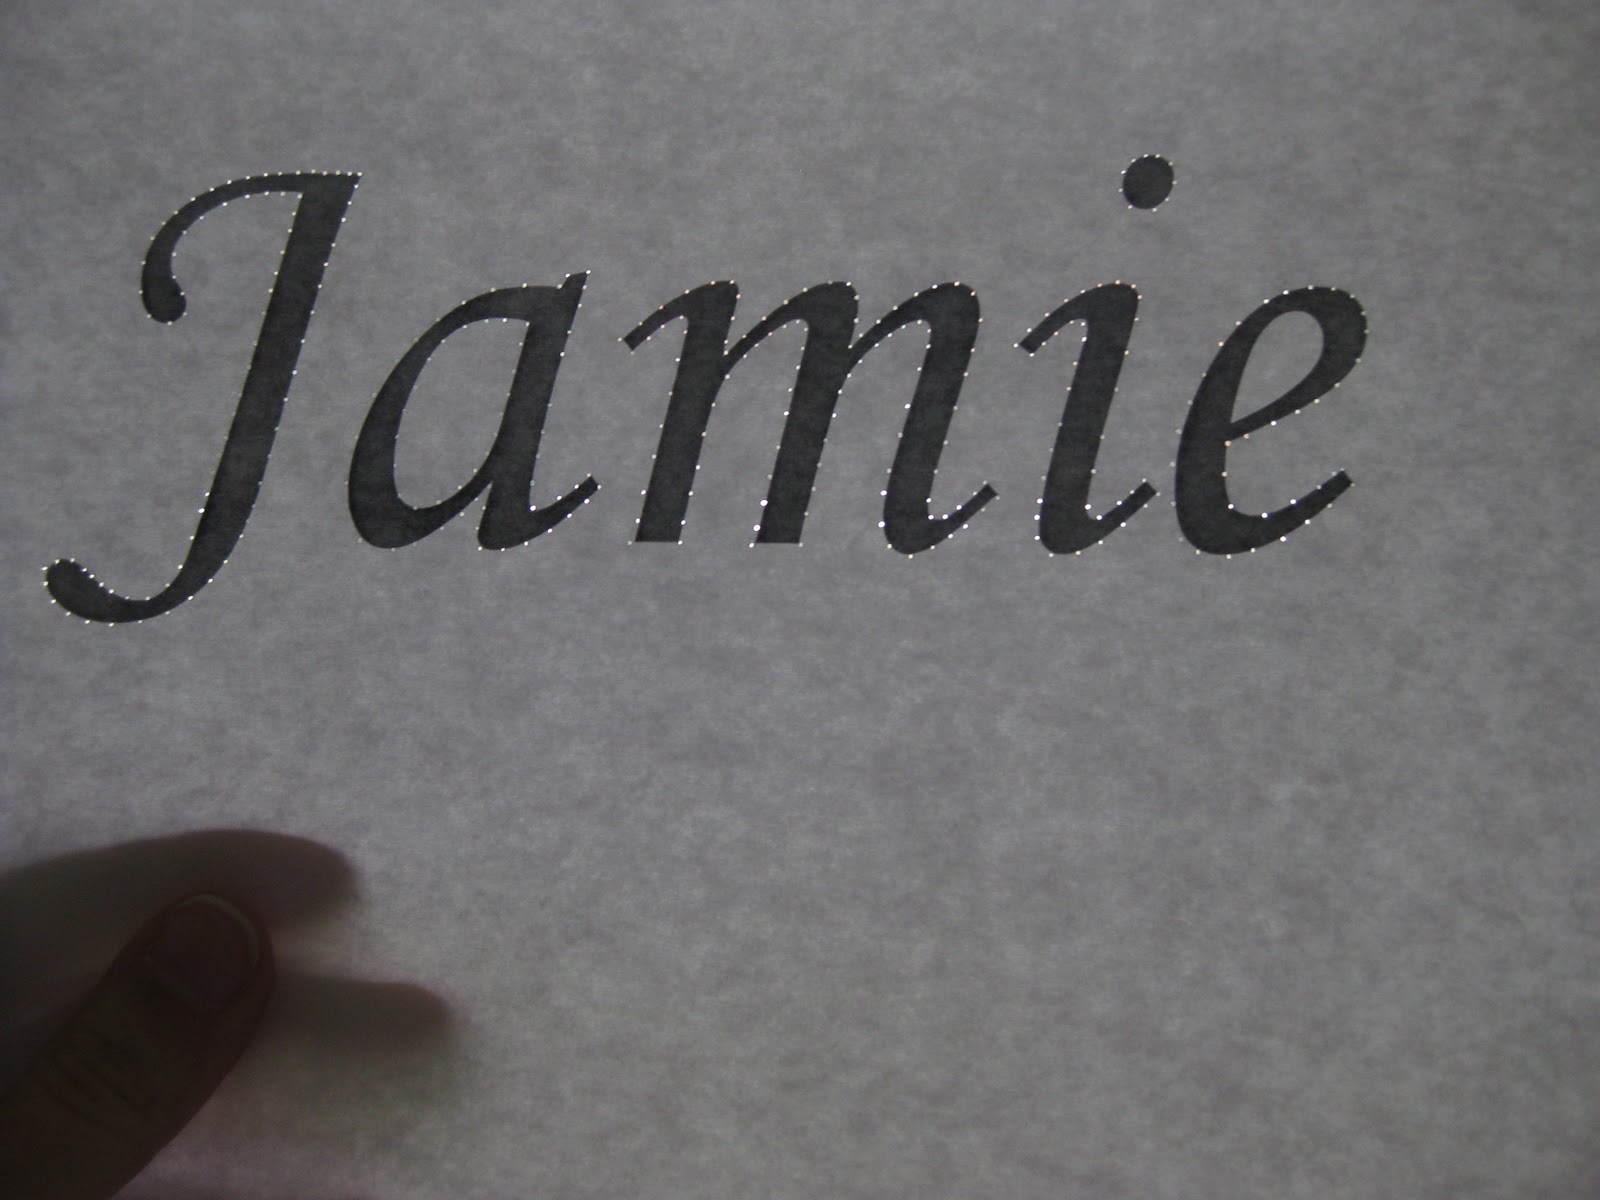
Then cut down the paper to get an accurate idea of where the center should be and taped it to the top of the photo box. From there I took a purple sharpie and went over each hole (sorry for the inconsistancy with the names...you get the idea!):


Then just connect the dots and color in!! Easy peasy...it would also be alot easier if I had a vinyl cutter or one of those fancy dancy machines but hey..we're saving for a wedding! Hmm.. I wonder if I can register for one of those....anyway.. On to packing each box:
None of the girls (or the moms) knew that they were getting these gifts (util I spoiled it with the last post :P), nor do they know what roles I would like them to play (the bridesmaids/maid of honor...I'm pretty sure the moms know how to be moms :) ) So I decided to write little poems to "ask" them to be part of my party and when they opened the box it would reveal what role they would play.
I started by folding the robes so the back embroidery with "bridesmaid" or "maid of honor" faced up. I then put the bottom half of the robe in the box first along with the other goodies:

To make the pockets:
Start with a sheet of paper (mine was 12 x 12 but you could easily use pretty colored standard size paper) and measure it to be 7 and 3/8 inches wide by 8 and 1/2 inches long:


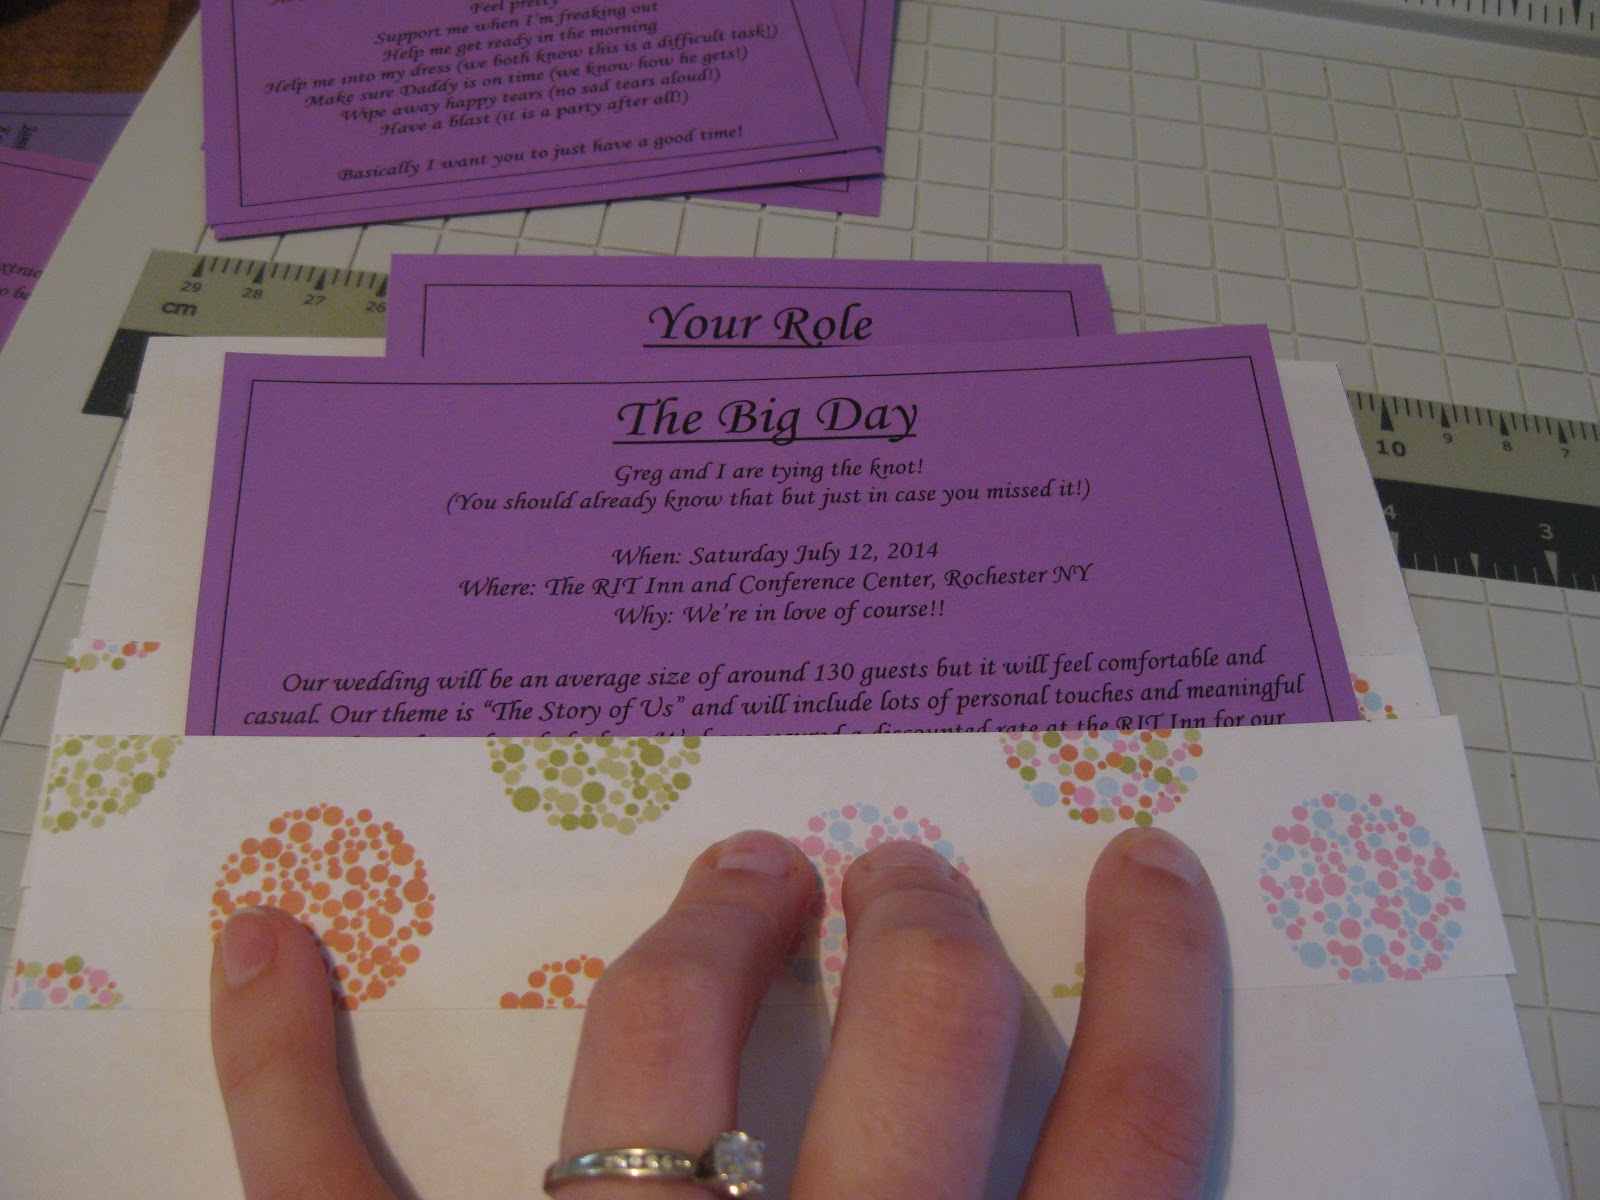
I didn't have precise measurements for this part, I just laid each card down and determined where each strip should go. From there I glued the bottom and side of each strip leaving the top open to create a pocket for the card to sit in.

Once all three cards were in place I folded the bottom of the paper up to give it a finished look and glued down the two sides to keep everything from falling out :)
After I arranged everything in the box I folded the rest of the robe over to reveal the back embroidery:


For the moms robes I decided not to get the backs embroidered because I wanted them to enjoy them after the wedding, they won't always be "Mother of the Groom" or "Mother of the Bride" so I kept it simple with just the front monogram. I used the exact same process to package their boxes as I did for the others except I folded them so that the front monogram was showing rather than the back of the robe:


From there to keep the element of surprise I covered each robe with some fun confetti tissue paper and placed the ribbon wands and poem on top (the stinkin wands wouldn't fit length wise in the box, then when I got them in there the lids wouldn't close...so I had to go with putting them on top..lol)

Poem for the maids/maid of honor

For my Mom:


For my soon to be Mother-in law:


These might be a little hard to read so I've attached the word documents for you. This is my original work but please feel free to use it for you own creation or tweak it to fit your DIY :)
And finally the finishing touches; I added some pretty ribbon to each box (after I put the lids on...hopefully that was self explanatory) :


Some specs:
The whole project took me about 5 hours between writing each poem (that was the hardest part!) creating each "info card",(everyone got 3 cards; "Your Role", "Meet the Maids", and "Our Day") mounting the paper, creating each pocket for the info cards and packaging/wrapping each box. I spread this out over 2 days so it really wasn't so bad.
My total budget for each gift was $50/box.
I was able to get the photoboxes on sale 4 for $10 and I also got the bracelets 3 for $10 at A.C. Moore I also get rockin discounts because I'm a teacher so the total came to $18.36 with tax. I had a gift card so these were FREE!
The paint chips (which I wound up not using) were free from Home Depot.
The mugs were $4.98 each at WalMart I also bought myself one (how perfect are they for mimosas?!!) for a total of $32.27 with tax for 6. I had a gift card for this purchase as well so, again these were FREE!
The tissue paper I got from the Dollar Store...therefore it only cost a $1 (technically $1.08 with tax)
The wands I purchased from another bride in a package deal that had 41 wands, 64 bubble containers, extra ribbon spools, a Lenox cake set and a basket to keep it all in for $20. So these came to less than $1 each.
And finally the robes came to $38 a piece for the robes with front and back embroidery and $31 for the ones with just the front monograms. For a total of $216 (including my robe that was $41)
All in all for I spent approximately: $40 per bridesmaid and $33 per mom. :)
What do you think?
If you have questions feel free to post in the comments!
What do you think?
If you have questions feel free to post in the comments!
This comment has been removed by the author.
ReplyDelete